Showing posts with label vegetarian. Show all posts

Tuesday, November 29, 2011

Homebrewed Chai Latte


Oh yes I did. And the aroma wafting through the house is nothing short of divine.

I have prepared my first batch of homemade chai in my new Little White Kitchen.

Remember back in July of 2011 when I posted my original chai recipe to Dance While You Cook?

Do you also remember how I gave you general directions for making this homemade chai and told you to experiment around to find the perfect blend to suite your taste?

Now that I'm all moved-in to my new home out in the country, I wish to share with you my favorite blend for this homemade Masala Chai. I have been making this recipe for years and the mix of spices I'm about to describe make for a cup of perfection each and every time.


Judith's Masala Chai Concentrate

Ingredients:

cinnamon sticks, the 4-inch sticks, crushed into chips
3 TBS whole cardamom pods, crushed
2 TBS whole cloves
2 TBS fennel, crushed
   or 4 whole star anise
   or both
2 TBS whole black peppercorns
3 TBS chopped ginger, crystallized
1/4 tsp ground cayenne pepper, or less if spicy drinks aren't your thang
5 heaping TBS loose-leaf Assam black tea, caffeinated or decaf—whatever your preference
16 cups water

The Preparation Method:

First and foremost, have everything measured out and ready to go.

Then, in a large stock pot, dry-roast the first five ingredients over high heat: 8 crushed sticks cinnamon, 3 TBS cardamom, 2 TBS cloves, 2 TBS fennel, and 2 TBS peppercorns.

Roast only until fragrant. Do not smoke the spices. They should not change color. Usually two or three minutes max.

Immediately pour water into the hot pot with spices. Keep heat on high. Add chopped ginger.

Boil with vigor until the water has reduced to half. For me this is usually about 30 minutes or so. I have an easy method for determining when you've reached the halfway mark. Either it's too late, or I'm just plan lazy, so I'm not going to tell you about that here. Refer to my original chai post in July 2011 to learn more about this technique my Dad taught me when learning to make Lithuanian Krupnikas. But I digress. Krupnikas is for another day, another time.

Back to the chai. Once the water level reduces to the halfway point it is time to remove the pot from the heat source, add 5 heaping TBS loose-leaf Assam black tea and 1/4 tsp ground cayenne pepper. Mix well and let steep for five minutes. Don't let it steep a second longer. The tea will become bitter and that will ruin the whole effort.

Immediately strain the spices and tea contents from the chai concentrate. Combine the hot chai liquid to the 1/2 cup of sugar. Stir well. Cap tightly. Refrigerate. The concentrate keeps for one week (give or take) in the refrigerator.

To serve: Use one part chai concentrate to one part milk or milk alternative. I'm crazy for Almond Milk in this chai latte. Heat on the stovetop. Do not allow to boil. And done.

I sure hope you enjoy these fall mornings with a warm cup of home brewed chai as much as I do.

Instead of a song tonight, I thought I'd attach photos of a few scenes from my new location.


Saturday, November 26, 2011

Sweet Potato Casserole

You could say I am getting a head start on next year's Thanksgiving recipe postings. Or you could say that my Thanksgiving recipe posting planning went the way of most things I attempt to plan, straight to pot. 

Either way, this recipe is hands-down one of the favorites at our Thanksgiving table every year. It's such a hit that I typically make it for Christmas dinner as well. Maybe you will too.

This recipe finds its origins with our dear friend, Dr. B, who is from the South. Before I met Dr. B, I never had a sweet potato casserole. A cryin' shame. 

About a decade ago he brought it to a Thanksgiving potluck at church. Upon request, he passed the recipe along to me from his mother. Whom I'm sure was passed along the recipe from someone else after attending a Thanksgiving potluck at church. 

My point here is twofold. Despite the fact that I'm a Yankee [proven by my 22% Dixie score on this here Advanced Rebel-Yankee test], this recipe is Southern through and through. And despite that I've made some changes to accommodate our special gluten and dairy free diet, good recipes always have a way of getting passed down from homecook to homecook. This is one of those recipes. Dixie disclaimer: I reduced the amount of sugar in the casserole by half... and it still tastes like dessert to me.

Sweet Potato Casserole

Ingredients:

Filling
1/2 cup sugar
1/2 tsp salt
2 eggs
1/2 stick butter (or butter alternative such as Earth Balance)
1/2 cup milk (or milk alternative such as Almond Milk)
1 tsp pure vanilla extract
3 cups canned sweet potatoes

Topping
1 cup light brown sugar
1/2 cup self rising flour (or 1/2 cup of your favorite gf flour mix + 3/4 tsp baking powder)
1 1/2 cups chopped pecans

On Top of the Topping
1/3 stick butter (or butter alternative such as Earth Balance)

The Preparation Method:

This recipe is super easy. Literally two steps and done.

Preheat oven to 350 degrees.

Mix filling ingredients together with a handheld blender. Distribute mixture evenly in a well greased 9 x 13 baking dish.

Mix topping ingredients together.

Distribute topping evenly over the sweet potato filling.

Place pads of butter evenly over the top. Cover with tin foil.

Place in preheated 350 degree oven for 20 minutes. Remove foil covering. Continue cooking for another 15 minutes or until the topping is nice and brown.


Serve as a festive holiday side dish, or even as a gluten and dairy free dessert. Scrumptious!

----------------------------------------------------------------------------------
Gavin DeGraw has been blowing my mind lately. I can not get enough of his music, specifically his 2011 album Sweeter. If you have not heard this yet, you need to. There is something so remarkable about this man's music. Please, please, I beg of you, go listen to his album on Spotify right this instant.

But in keeping true to the holiday spirit, I am compelled to play a little Christmas jingle for you. Gavin DeGraw displays his musical prowess here singing Merry Little Christmas.

Friday, November 18, 2011

Thanksgiving Tagine

I present this recipe as an alternative to all the traditional Thanksgiving fare you're likely planning this week. Tagine is a nice gluten-free and vegan option to present on your Thanksgiving table for your guests with special diets. Totally untypical, I know, but with the squash and carrots it has a festive flair about itself. It's super easy to make the day before, and in fact, becomes more delicious after it sits in the refrigerator overnight.

Should you choose not to replace your T-Day favorites with this Moroccan classic, my tagine will make a fantastic recipe for Saturday night's dinner once you've grown completely annoyed with all the holiday leftovers.

Here's to a great week of preparation for giving thanks abundantly!

Thanksgiving Tagine


Ingredients:

2 TBS grapeseed oil
1 small onion, diced
3 cloves garlic, minced
1 small butternut squash, peeled and chopped
1 can garbanzo beans, drained and rinsed
2 medium carrots, peeled and chopped
1/4 cup raw unsalted cashew halves
1/4 cup raisins
14.5 ounce can diced tomatoes
14 ounces vegetable broth
1 TBS sugar
1 TBS fresh lemon juice
1 tsp ground turmeric
1 tsp ground coriander
1 tsp sea salt
1/8 tsp ground cinnamon
1 dash cayenne pepper
1 cube crystalized ginger, or 1/4 tsp ground ginger

The Preparation Method:


Heat grapeseed oil in a large pot over medium heat.

Add onion and garlic, cook until softened.

Add all other ingredients. Stir well. Reduce heat to medium, cover and simmer for approximately 30 minutes until all vegetables are tender as evidenced by how easily they are pierced with a fork.

If you and gluten don't agree, serve with quinoa. If gluten is your friend, serve with the traditional couscous.

Enjoy!

----------------------------------------------------------------------------
Speaking of non-traditional holiday delights, I found this remarkable Christmas tune (go figure) the other day. Seeing as Thanksgiving is just the gateway to Christmas, and Moroccan Tagine really has nothing to do with Thanksgiving, I thought this Hawaiian Christmas jingle would be an appropriate video to accompany this dish. Yay for Brushfire Records just released second Christmas album This Warm December, A Brushfire Holiday Vol. 2 !!!! Such quality music.

Jack Johnson - In The Morning

Jack - In The Morning from Brushfire Records on Vimeo.

Wednesday, November 2, 2011

Apple Spice Muffins (Gluten Free)

The fall bounty is in full effect. Apples of every kind line the market aisles. Big ones. Small ones. Juicy ones. Tart ones. Red ones. Pink ones. It's apple mania, people!

Why not make use of fall's most notorious fruit in some fluffy gluten-free muffins? Besides, baking this treat today will fill your home with a heavenly aroma. Why not! Let's not waste another minute...

Apple Spice Muffins (Gluten Free)

Makes 12 muffins

Ingredients:

Wet Ingredients = Large Mixing Bowl
3 large eggs
3/4 cup applesauce
1 cup light brown sugar
1/2 cup canola oil
2 tsp vanilla extract
1 tsp cinnamon
1 tsp apple pie spice

Dry Ingredients = Small Mixing Bowl
1 1/2 cups sweet white rice flour
1/2 cup buckwheat flour
1 tsp baking powder
1/2 tsp sea salt

Filling
1 sweet apple - peeled, cored and diced


The Preparation Method:

Preheat oven to 350 degrees.

Whisk the three eggs well. Add remaining wet ingredients. Stir together until well blended.

Combine dry ingredients in a separate bowl.

Add the dry ingredients to the wet ingredients. Fold gently to combine. Do not over-stir. Stir just enough to make the dry ingredients wetted. Gluten-free muffins are temperamental. Don't go agro on 'em, folks. Be gentle. And kind. If you take your time, the muffins will be gentle and kind right back at you.

Just like the Gluten-Free Pumpkin Buckwheat Muffins I posted last month, stirring too much will cause your muffins to turn out tough. And like I've said before... nobody likes a tough muffin. A tough cookie, maybe, but not a tough muffin.

Have the peeled, cored and diced apples on hand.

Begin filling the muffin cups just halfway. About a tablespoon of batter will do. We're going to fill the center of the muffin with the diced apples and finish up with another tablespoon of batter on top.

With a technique like this we might as well call this recipe Spiced Apple Surprise Muffins.

Once all the apples are tucked nicely inside each muffin cup, bake in a preheated 350 degree oven approximately 18 minutes (give or take) until a toothpick inserted to the center of the muffin comes out clean. Don't overcook. This also leads to tough gluten-free muffins, friends.

Enjoy!

----------------------------------------------------------------------------------------
Raise your hand if you love Mat Kearney as much as I do. Ah-ha, I knew it. See, that's why we're friends.

This song is so flippin' fantastic it deserves a three-peat listen-to. Amazingly enough, the video is approximately twelve times more fantastic than the song by itself. How hard is that to accomplish? Go, Mr. Kearney, Go!

Mat Kearney - Hey Mama


(Special note for my readers who receive Dance While You Cook posts via email: I realize you may not be able to play the videos I've been posting from this email. You probably already realize this, but just to be sure I thought I'd mention it. Click on the link at the top of the page to get through to my website so you can see the videos play.)

Wednesday, October 26, 2011

Braised Collard Greens with Coconut Milk


Last week I showed up to teach my childbirth class raving about a delicious collard green recipe I made for dinner that night. My husband and I virtually inhaled an entire head of collard greens in two minutes flat. I will admit, this behavior was quite shocking for both of us. Leafy greens have not been a strongpoint at our dinner table recently. Errrrrr, I mean, ever. 

In class that evening, the topic was prenatal nutrition. I mentioned the amazing properties of collard greens and the benefits for pregnant women and their growing babies. When discussing a healthy and well-balanced diet in pregnancy, I talked on the topic of "Eating Smart". The bottom line is if you choose your foods wisely you will pack the most powerful punch into each meal. This way you get all of your essential nutrients without turning eating into a chore.

Fresh cooked collard greens contain the following essential nutrients:

Calcium & Magnesium — Essential to proper functioning of muscle contractions. (Hello, Uterus!)

Potassium — Is known to relieve pregnancy related muscle cramps. (Good Evening, Charlie Horse!)

Folate — Reduces the risk of anemia for the mother & supports rapid growth of the placenta and fetus. (Hello, Healthy Little One)

Vitamin C — Fights infection and helps to build a healthy placenta. (Welcome, Most Amazing Temporary Organ in the Human Body!)

Vitamin A — Contributes to healthy skin and mucus membranes. (Hello, Amniotic Sac!)

Choline — Helps fetal brain cells to develop properly. (Ahhh, Genius!) 

Not only do collard greens pack a punch, but the coconut milk in this dish offers quite a bit of benefit as well. Coconut milk contains healthy fats and is known to be anti-carcinogenic, anti-bacterial, anti-microbial and anti-viral. 

Good heavens! You have to try this recipe. Go for the organic greens at the market and prepare them as soon as possible. The collard greens will turn bitter if left to sit in the refrigerator too long. Also worthy to note, the smaller the leaf on the collard green, the milder the flavor. 

Let's get started...

Braised Collard Greens with Coconut Milk

Serves: 2
Prep Time: approximately 20 minutes

Ingredients:
1 TBS grapeseed oil (or olive oil)
1 bunch collard greens, torn into pieces away from the stem
1/2 small yellow onion, thinly sliced
1/2 cup coconut milk
1/2 TBS fresh squeezed lemon juice
Salt & fresh ground black pepper, to taste

The Preparation Method:

Bring a large pot of water to boil.

Wash the leaves of the greens from all dirt and sand. Wash well. Gritty greens are never very tasty.

Tear the leaves apart away from fibrous stems. Dispose of the stems. Set aside.

Slice the yellow onion thinly. Set aside.

Juice that lemon. Set aside.

Once the water is boiling, add some salt and the torn greens. Cook for 2 minutes. Drain well and set aside.

Heat grapeseed oil in a large skillet over medium heat. Add sliced onions. Gently salt and cook about 5 minutes until soft and translucent, stirring often.

Add the well-drained collard greens. Gently salt and cook about 2 minutes, stirring the entire time.

Add 1/2 cup coconut milk and 1/2 TBS lemon juice. Stir well and gently simmer about 5 minutes or until tender.

Season with salt and pepper to your liking. Serve hot or cold.

Enjoy!

---------------------------------------------------------------------
Oh boy, this sounds good!

Yo-Yo Ma, Stuart Duncan, Edgar Meyer & Chris Thile — Attaboy (Live)

Wednesday, October 19, 2011

Creamy Roast Pumpkin Soup (Vegan & Gluten-Free)

I'm on a roll with the pumpkin theme over here at Dance While You Cook. If you've been hanging around these parts for any amount of time you may have deduced that I am really whimsical in my postings and don't plan a thing, so this pumpkin theme in the month of October certainly wasn't intended.

It's just that pumpkin is jumping out at me from every angle. And I'm jumping on board.

(In case you missed my last few posts, check out my gluten-free pumpkin buckwheat muffins and this six pack of cider beer sitting in my ice box right now.)

I must admit, pumpkin is so darn tasty it keeps me dancing in The Little White Kitchen all month long.

Today's recipe for gluten and dairy free Creamy Roast Pumpkin Soup serves up all the rich warmth we've come to expect in a soup perfectly suited for a crisp fall evening.

Creamy Roast Pumpkin Soup (vegan & gluten-free)


Serves 6

Ingredients:
2 TBS olive oil
1 medium yellow onion, diced
3 cloves garlic, minced
1/2 tsp ground coriander
2 medium pie pumpkins, roasted
2 cups raw cashews
2 cups plain rice milk
4 cups vegetable broth (can use chicken broth if you prefer)
1/2 cup light brown sugar
1 tsp salt
a few dashs of cayenne pepper
flaky sea salt, to taste

The Preparation Method:


Preheat oven to 350 degrees.

Roasted Pumpkins
Cut pie pumpkins in half, seed and gut. Reserve the seeds for roasting.

Spread a small amount of olive oil over the inside of the pumpkin. Sprinkle with sea salt. Place pumpkin halves flat side down in a baking dish. Roast pumpkins in preheated oven for approximately 1 hour, or until the flesh of the pumpkin is soft and can easily be scooped out of the pumpkin shell.

Cashew Cream
This recipe calls for 2 cups of cashew cream. To make the cashew cream, take 2 cups of raw cashews and soak them in water for at least 20 minutes. Drain water. Place in blender with 2 cups plain rice milk. Blend until smooth. Keep blending so there are no chunks what-so-ever. Measure out 2 cups and set aside. (Freeze all remaining cashew cream for use at another time.)

Toasted Pumpkin Seeds
While the pumpkins are roasting, begin preparing the pumpkin seeds for toasting. Wash the pumpkin seeds in a bowl of cold water. Drain water from seeds and set aside on a towel. If soaking wet, give them a spin in the salad spinner to remove some of the excess water. In a small mixing bowl, toss pumpkin seeds with a touch of olive oil, a few dashes of cayenne pepper and some sea salt. Lay in a single layer in a baking pan. Place in the oven with the roasting pumpkins. Allow the seeds to roast until they are nice and brown, approximately 30 minutes. Be sure to stir halfway through to toast all sides evenly. Add more salt once you pull them out of the oven.

The Soup
Next, get all of the other materials for the soup ready. Once the roasted pumpkin is ready the rest of the soup will come together very quickly.

Once the pumpkins are done roasting, scoop all of the flesh out of the shells, mush well and set aside.

In a large soup pot, heat 2 tablespoons olive oil over medium-high heat. Add the diced onion and minced garlic. Cook over medium-high heat until soft and starting to brown, approximately 5 minutes. Add 1/2 teaspoon ground coriander, stir well and continue to cook for another minute.

Add all of the mushed pumpkin (approximately 4 cups) and 4 cups broth. Stir well. Allow to cook for another 10 minutes.

Using a submersion blender, or a standard blender, puree the soup until super smooth.

Return soup to large pot and add 1/2 cup light brown sugar, 2 cups cashew cream and 1 teaspoon salt. Stir well to combine. Heat through and serve with a hearty helping of roasted pumpkin seeds as a garnish.

Enjoy!

----------------------------------------------------------------------
I couldn't find a video for this song, but none-the-less, you need to listen to it. So fantastic! I have no idea what it's about, but what the heck, it's groovy. Who can complain? Anyone want to translate for me?

MC Solaar - Bling Bling

Wednesday, October 12, 2011

Pumpkin Buckwheat Muffins (Gluten Free)


'Tis the season for all things pumpkin. These gluten and dairy free muffins are such a huge hit in my household—a batch of twelve barely lasts twelve minutes out of the oven. Even the neighbor kids devour these little bad boys, asking for seconds and thirds. This is a good sign when it comes to gluten-free baked goods around here. A real good sign. 

Pumpkin Buckwheat Muffins (Gluten and Dairy Free) 

Makes 12 muffins

Ingredients: 

Wet Ingredients = Large Mixing Bowl
3 large eggs
3/4 cup canned pumpkin puree (this is half of a 14oz can)
1 cup light brown sugar
1/2 cup canola oil
2 tsp vanilla extract
1 tsp cinnamon
1/2 tsp allspice
1/4 tsp ground nutmeg
1/4 tsp ground cloves

Dry Ingredients = Small Mixing Bowl
1 1/2 cups sweet white rice flour
1/2 cup buckwheat flour
1 tsp baking powder
1/2 tsp sea salt

The Preparation Method:

Crack 3 eggs in a large mixing bowl and whisk well. Add 1/2 cup canola oil and whisk to combine. Add the remaining 'wet' ingredients from the list above.

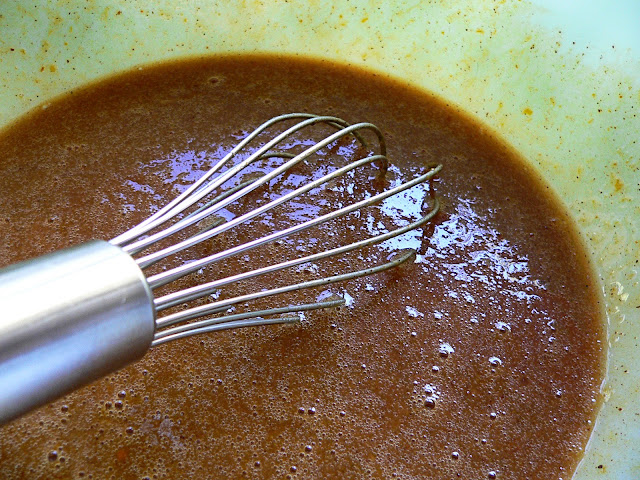
Whisk well to combine.

In a small mixing bowl combine all the ingredients from the 'dry' list above. Whisk well to combine.

Add the dry ingredients to the wet ingredients.

Do not whisk well to combine. Lightly fold the ingredients together until the wet has wetted all the dry. Do not stir too much. This will cause your muffins to turn out tough. Nobody likes a tough muffin. A tough cookie, maybe, but not a tough muffin.

Once the dry ingredients are lightly folded into the wet, it's time to place them into your muffin wrappers.

Place muffins in a preheated 350 degree oven. Bake 15-20 minutes until the tops of the muffins are golden brown and a toothpick comes out clean when inserted into the center. Be careful not to bake too long. This too will result in a tough muffin.

Remove from the oven and place immediately on a rack to cool. Try your darndest to let them sit for five minutes before devouring.

Bring them to kiddie Halloween parties. Bring them to neighborhood pot-lucks. Bring them to your office and hide them in the corner of your desk. This way they might last longer than twelve minutes. No one will know but you. The little people might start questioning you with that heavenly smell coming out of the kitchen, but I'm certain you'll find a way to explain that away. Pumpkin muffins? What pumpkin muffins?

----------------------------------------------------------------------------

Here's a somewhat Halloweenish video to get you groovin' while you bake.

Beastie Boys - Intergalactic

Friday, August 12, 2011

PW's Pasta with Whiskey, Wine, and Mushrooms - Gluten and Dairy Free

I'm a fool for cream sauces.

I'm an even bigger fool when said cream sauce includes mushrooms.

Throw in some white wine and Jack Daniels, pour it over pasta and my satisfaction meter goes through the roof.

Being gluten and dairy-free you might assume that I've run across a handful of roadblocks in my efforts to indulge my addiction.
Cream + Pasta = A Different Lifetime

I used to have a problem indulging my addiction. But that was the past. Back when gluten and dairy-free was tantamount to dry, bland and lifeless dinners.

Let me tell you a secret. I don't have a problem indulging my addiction any more.

Welcome to this lifetime. The one where I discovered cashew cream. It is the answer to all my problems. Well, not ALL of them, just most of them.

Earlier this week, one of my favorite blogs—The Pioneer Woman—posted a recipe for Pasta with Whiskey, Wine, and Mushrooms. I began salivating. I need. I need now.

I couldn't wait to try this recipe with gluten-free Mostaccioli and dairy-free cashew cream. Lord have mercy, my satisfaction meter was hovering somewhere near the ceiling just thinking about dishing it up on my dinner table that night.

For you today... a gluten-free and dairy-free rendition of The Pioneer Woman's Pasta with Whiskey, Wine, and Mushrooms.

PW's Pasta with Whiskey, Wine and Mushrooms (Gluten and Dairy Free)


Ingredients:
24 ounces thickly sliced mushrooms (baby Portobellos are more than delicious in this recipe)
2 TBS olive oil
salt & pepper, to taste
4 TBS olive oil (or even better, 2 TBS olive oil + 2 TBS butter)
1 whole large onion, peeled and sliced
1 cup dry white wine (Sauvignon Blanc offers nice flavor and is easy to work with)
3/4 cups Whiskey (time to pull out the Jack friends—gulp, gulp, gulp)
1/2 cup chicken broth (or mushroom stock if vegetarian)
1 cup heavy cashew cream (1 cup dry raw cashews* + 3/4 cups plain rice milk + 1/8 tsp salt) — *cashews need to soak a minimum of 4 hours
12 ounces gluten free Mostaccioli, cooked Al Dente

The Preparation Method:

Earlier in the day, say, first thing in the morning, you need to start soaking the cashews in water. It's quite simple and will only take 30 seconds of your time. Seriously, the soaking step is what kept me from trying cashew cream for so long. Don't let this be you. Commit to the soak. It's not hard. Here, I'll break it down so you can see how easy it is.

1) Find a bowl.
2) Dump in 1 cup raw (unroasted, unsalted) cashews.
3) Pour water over the top until the nuts are sufficiently covered.
4) Set aside and don't think about it again until dinnertime.
5) Easy and done. Done and easy. Commit to the soak. You'll be happy you did.

A few things to know about cashew cream...

1) The longer the nuts soak, the smoother the sauce will be once blended. That said, you don't have to soak the nuts if you don't want to. It is possible to make cashew cream with nuts that haven't been soaked at all, or for just 1 hour, or for just 20 minutes. You should know that this will lead to a fairly gritty sauce. Some recipes can tolerate a gritty sauce. Others can't. Sauces that lay over pasta should be smooth, not gritty. Just thought you should know.

2) A healthy dose of salt is everything when we're talking cashew cream. Salt helps seal the deal as you attempt to use it as a replacement for real cream. Without salt, you will certainly be left questioning what all the hype is about.

You put your cashews to soak earlier in the day. You went off to play. Now it's dinner time. This recipe should take you about 30 minutes. Start to finish.

To begin, preheat oven to 375 degrees.

Lay thickly sliced mushrooms in a shallow baking pan and drizzle with a couple tablespoons of olive oil. Add a few dashes of salt and pepper over the top. Roast approximately 25 minutes—give or take—until the mushrooms are deeply browned. 

While the mushrooms are in the oven, it's time to make the cashew cream. Take the 1 cup of cashews that have been soaking all day (or not soaking at all) and add them to the blender. Add 3/4 cups plain rice milk and 1/8 teaspoon salt. Blend on high until a smooth sauce has formed. Smoothness is key here. Blend, blend and blend some more. Set aside.

In a large pot, heat 4 tablespoons olive oil over medium-high heat (or 2 tablespoons olive oil + 2 tablespoons butter). If butter is a part of your diet, then you should by all means use butter here. Butter makes everything better. I, myself, don't tolerate butter very well so I use olive oil instead. It works just fine.

Once the oil is hot, add the sliced onions. Saute until they are soft and translucent. You may even choose to let them caramelize just a touch for added dimension.

Now add the whiskey and wine and allow to bubble for a minute or so. Add the broth and allow the liquid to reduce for a few minutes.

Stir in 1 cup of cashew cream. Reduce heat to medium-low.

Add mushrooms and pepper to taste. Continue simmering while sauce thickens. While thickening, taste for proper saltiness. Keep adding more salt until just right for your palate. If the sauce doesn't taste like it's drawing together well, keep adding dashes of salt until it does. Like I said before, the proper amount of salt is everything when cooking with cashew cream.

Pour sauce over gluten free pasta. Serve immediately.

Enjoy!

----------------------------------------------------------
Have you ever noticed that Beyonce's got some moves? Just sayin'.

Beyonce - Run The World (Girls)

Tuesday, August 2, 2011

Super Thick Strawberry Almond Milkshakes


I may have mentioned how ridiculously hot my house is lately. We have no air conditioning, very little cross ventilation and one ceiling fan. That said, I have been ridiculously under-motivated to spend any time in the kitchen creating new recipes. Unless they are frozen. And include ice. And can be consumed through a straw.

Today I bring to you a recipe for something that will cool you off and replace a meal if you so choose. 

It's a milkshake. Not a true milkshake because there is no cow's milk in it. In fact, when I told my children that we were having milkshakes for dinner they asked me with such sweet innocence, "Mama, what's a milkshake?" It's a funny thing being dairy-free for so long. The children are not entirely aware of all the divine pleasures that exist out there in the world of eats and treats.

The unique thing about this milkshake, besides the absence of milk of course, is the addition of oatmeal. For months now I've been considering creative ways to use the leftover oatmeal from the morning's breakfast. 

Finally, the excess oatmeal has found a happy home in my Super Thick Strawberry Almond Milkshakes.

Super Thick Strawberry Almond Milkshakes

Ingredients:
1 1/2 cups almond milk
1 cup smooth almond butter (or less if you don't prefer your shake to be sooooo thick)
1 cup cooked oatmeal
2 cups frozen strawberries
1 banana, fresh or frozen
2 cups ice
1 1/2 TBS honey
1/2 tsp pure vanilla extract

The Preparation Method:
Combine all ingredients in a blender. Turn on high and puree until smooth.

For the Visual Learners Among Us:

Begin by measuring out your ingredients. One and a half cups almond milk—original or vanilla, sweetened or unsweetened—whatever your preference. I love, love, love Almond Breeze!

One cup creamy almond butter. Use half this amount if you would rather your Super Thick Milkshake move more quickly through the straw when all is said and done.

One cup precooked oatmeal. I love, love, love Bob's Red Mill Certified Gluten Free Old Fashioned Rolled Oats.

Two cups frozen strawberries, or more for a stronger strawberry presence.

One banana. Use a frozen one for proper milkshake thickness. Use a fresh one if that's all you have because you've made smoothies for dinner every night this week and you don't have any frozen bananas left.

Two cups ice cubes.

One and a half tablespoons honey.

One half teaspoon pure vanilla extract.

Blend it all up on high for a few minutes until you've achieved a Super Thick Strawberry Almond Milkshake.

 
Insert straw, enjoy the cool refreshment and sit outside under a shady tree where the cool wind blows.

--------------------------------------------------------------
Now that we've all cooled off a bit—let's dance!

Toby Keith - Beer For My Horses featuring Willie Nelson

Related Posts Plugin for WordPress, Blogger...